Marking a quilt is not my thing. I try to mark as little as possible. I generally mark guidelines for the area I want to quilt. For feathered wreaths, I will mark the outer and inner circles to designate the inner and outer edge of the feathers.
I needed to mark a white quilt, but my go-to marking tool is white chalk. I have a fear of using one of the various tools out there for marking quilts. I’m afraid I won’t be able to get the marks off the quilt. If it was my own quilt, I would have tried something. But as I was working on a customer quilt, I was hesitant.
So here is what I did.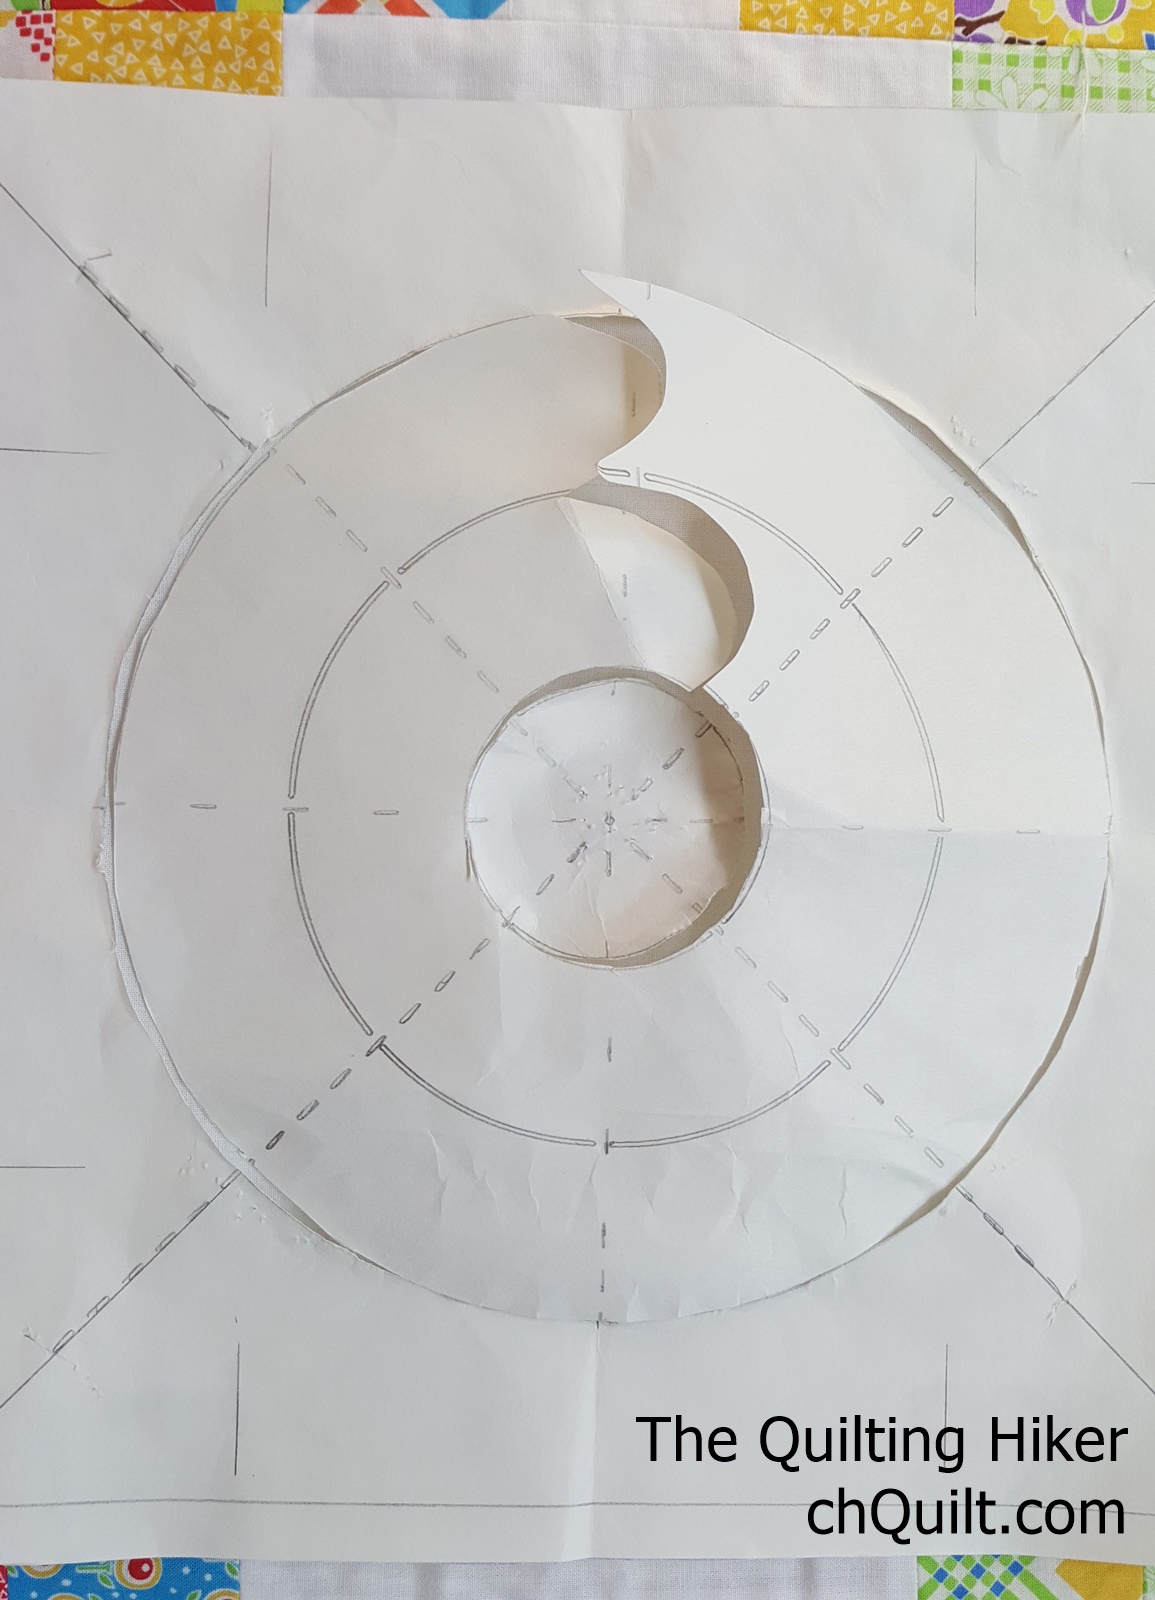
I took a piece of freezer paper twice as wide of the design I needed. Folded it in half and pressed the shiny sides together. Creating a stiff but flexible template blank. I then marked centering lines to assist in getting the circles centers. I drew the inner, center and outer circles for the size wreath needed. For this quilt, the measurements I used were 8.5″, 5.5″ and 2.5″.
Once the circles were drawn, I cut on the inner and outer circle lines. This created outer and inner circle templates, leaving a large donut the size of the desired wreath. Using the original centering lines, I lined the large outer circle template up within the block. Centering the template proved difficult, so I added more lines corresponding to the quilt block to assist in alignment. I pinned the template in place. If I had used template plastic, I would not have been able to pin through the plastic.
To center the inner circle. I found using the donut left from cutting the inner and outer circle as a guide worked best. I pinned the inner circle in place.
With that done, I used my 5″ circle template to stitch the center spine, knowing my hopping foot would add a 1/2″ to the overall diameter of the stitched circle. I have a set of nesting circles. If you are using whole circle templates, it would be easier to stitch the center spine then pin the inner circle template in place.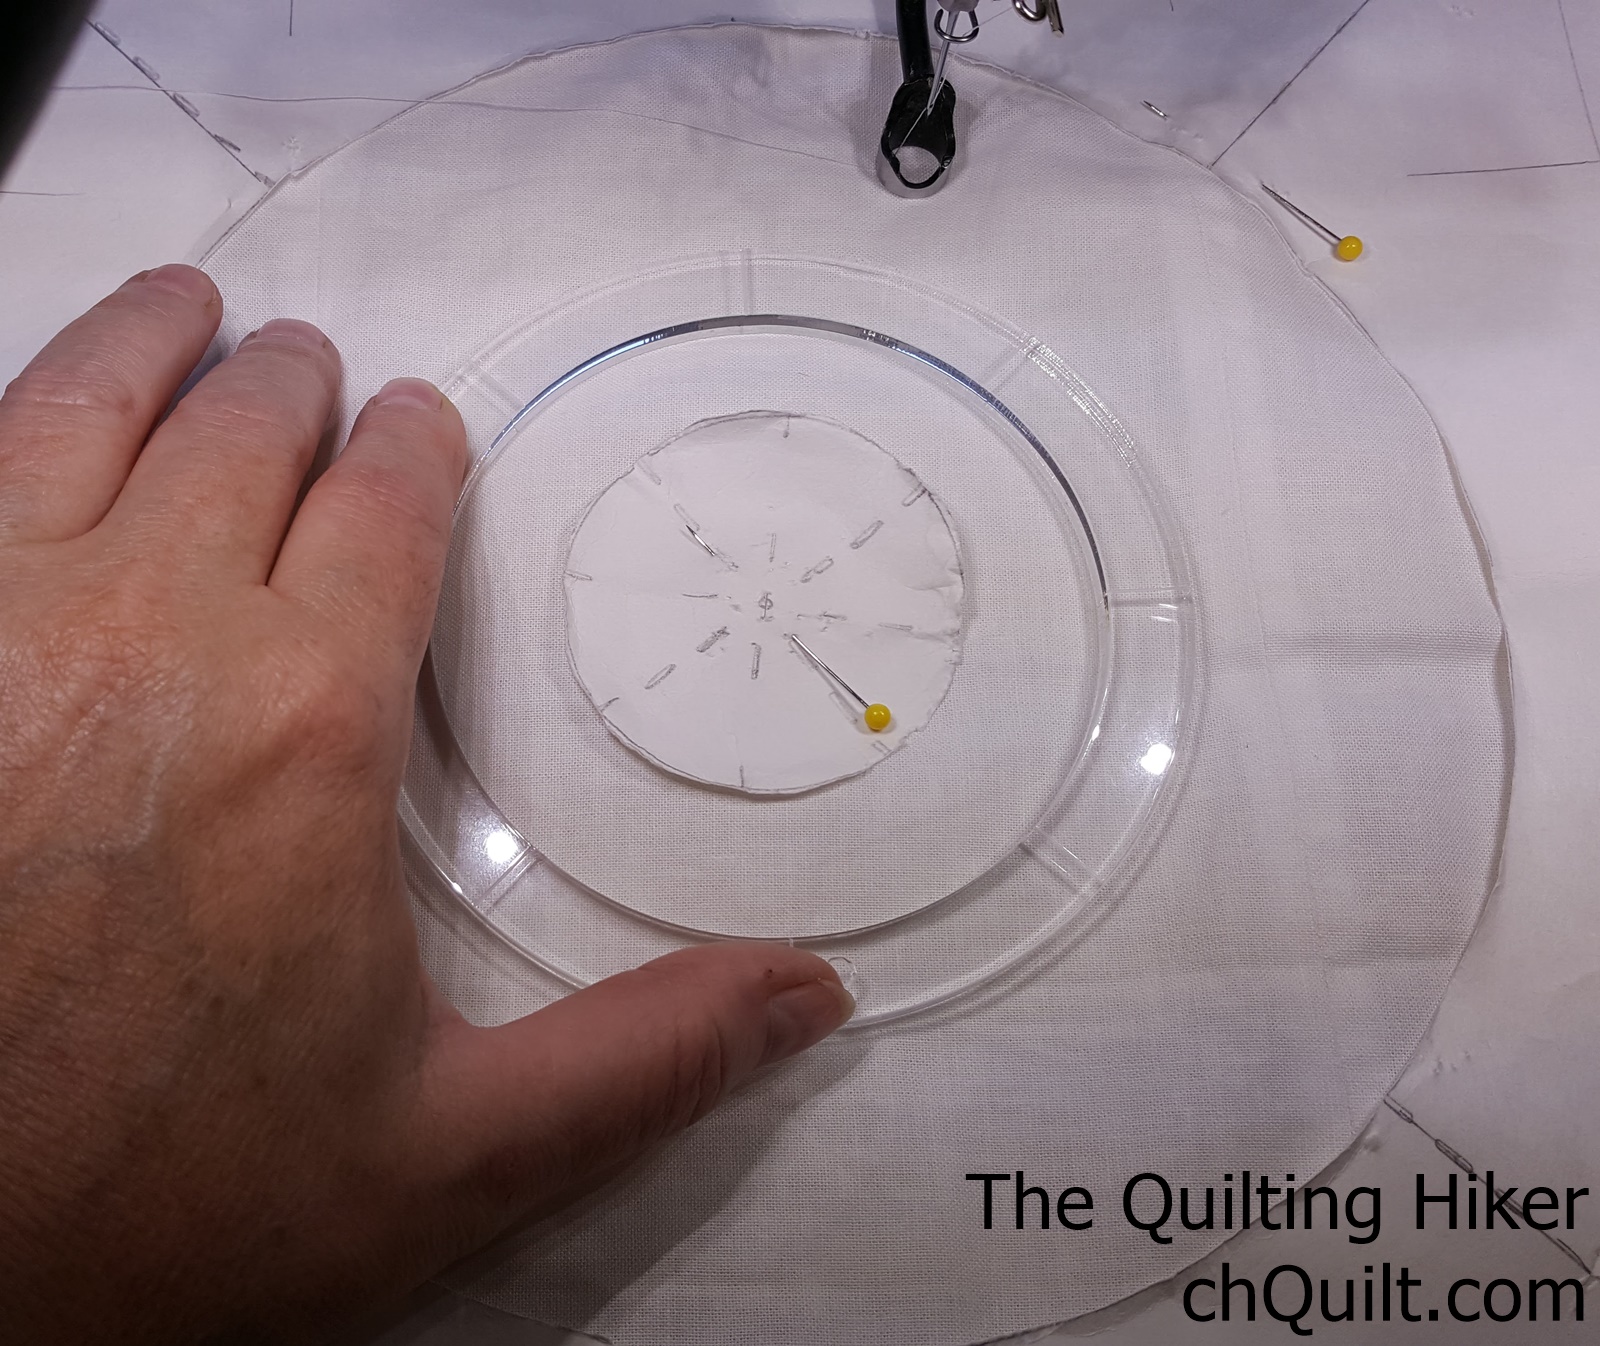
A few years ago, I took a feather class from Suzanne Early. She had a tip when stitching free motion feathers. It helps to draw in the first few feathers. Otherwise, the first feather can look less feather like. Brilliant. But how was I going to do this with my templates? I used the remaining donut piece to draw my beginning feathers. Then I cut the template along the line of the last feather.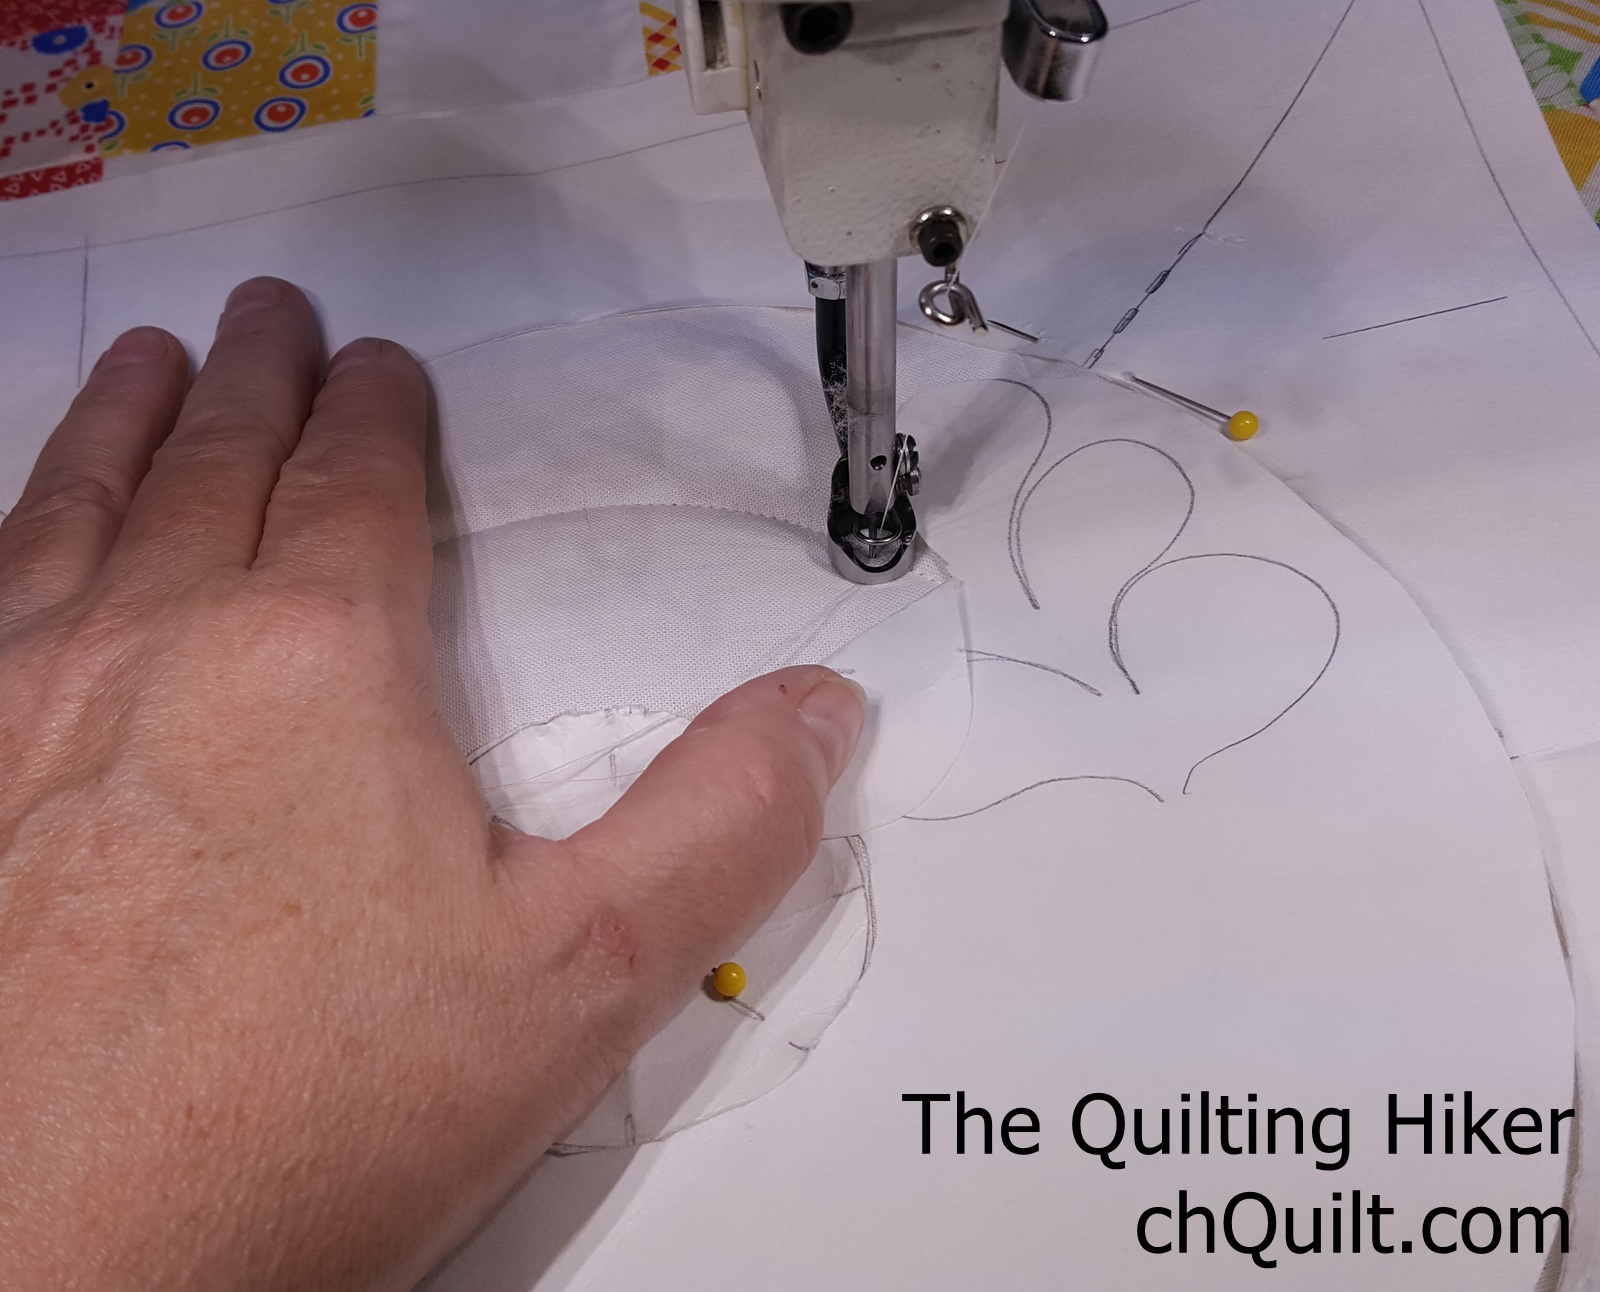
With the center spin stitched, I stitched the outer feathers next. Then I stitched the inner feathers. Once the inner feathers were stitched, I echoed the inner feathers and stippled in the center. It is at this point I stopped to cut the threads. So I was able to stitch the spine, outer feathers, inner feathers, echo quilting and stippling in the center without cutting the thread. Lastly, I echoed the outer feathers and stippled around the entire wreath.
The first few wreaths took a bit to get used to. But once I got going, the rest went fairly quick. This quilt needed 24 wreaths. 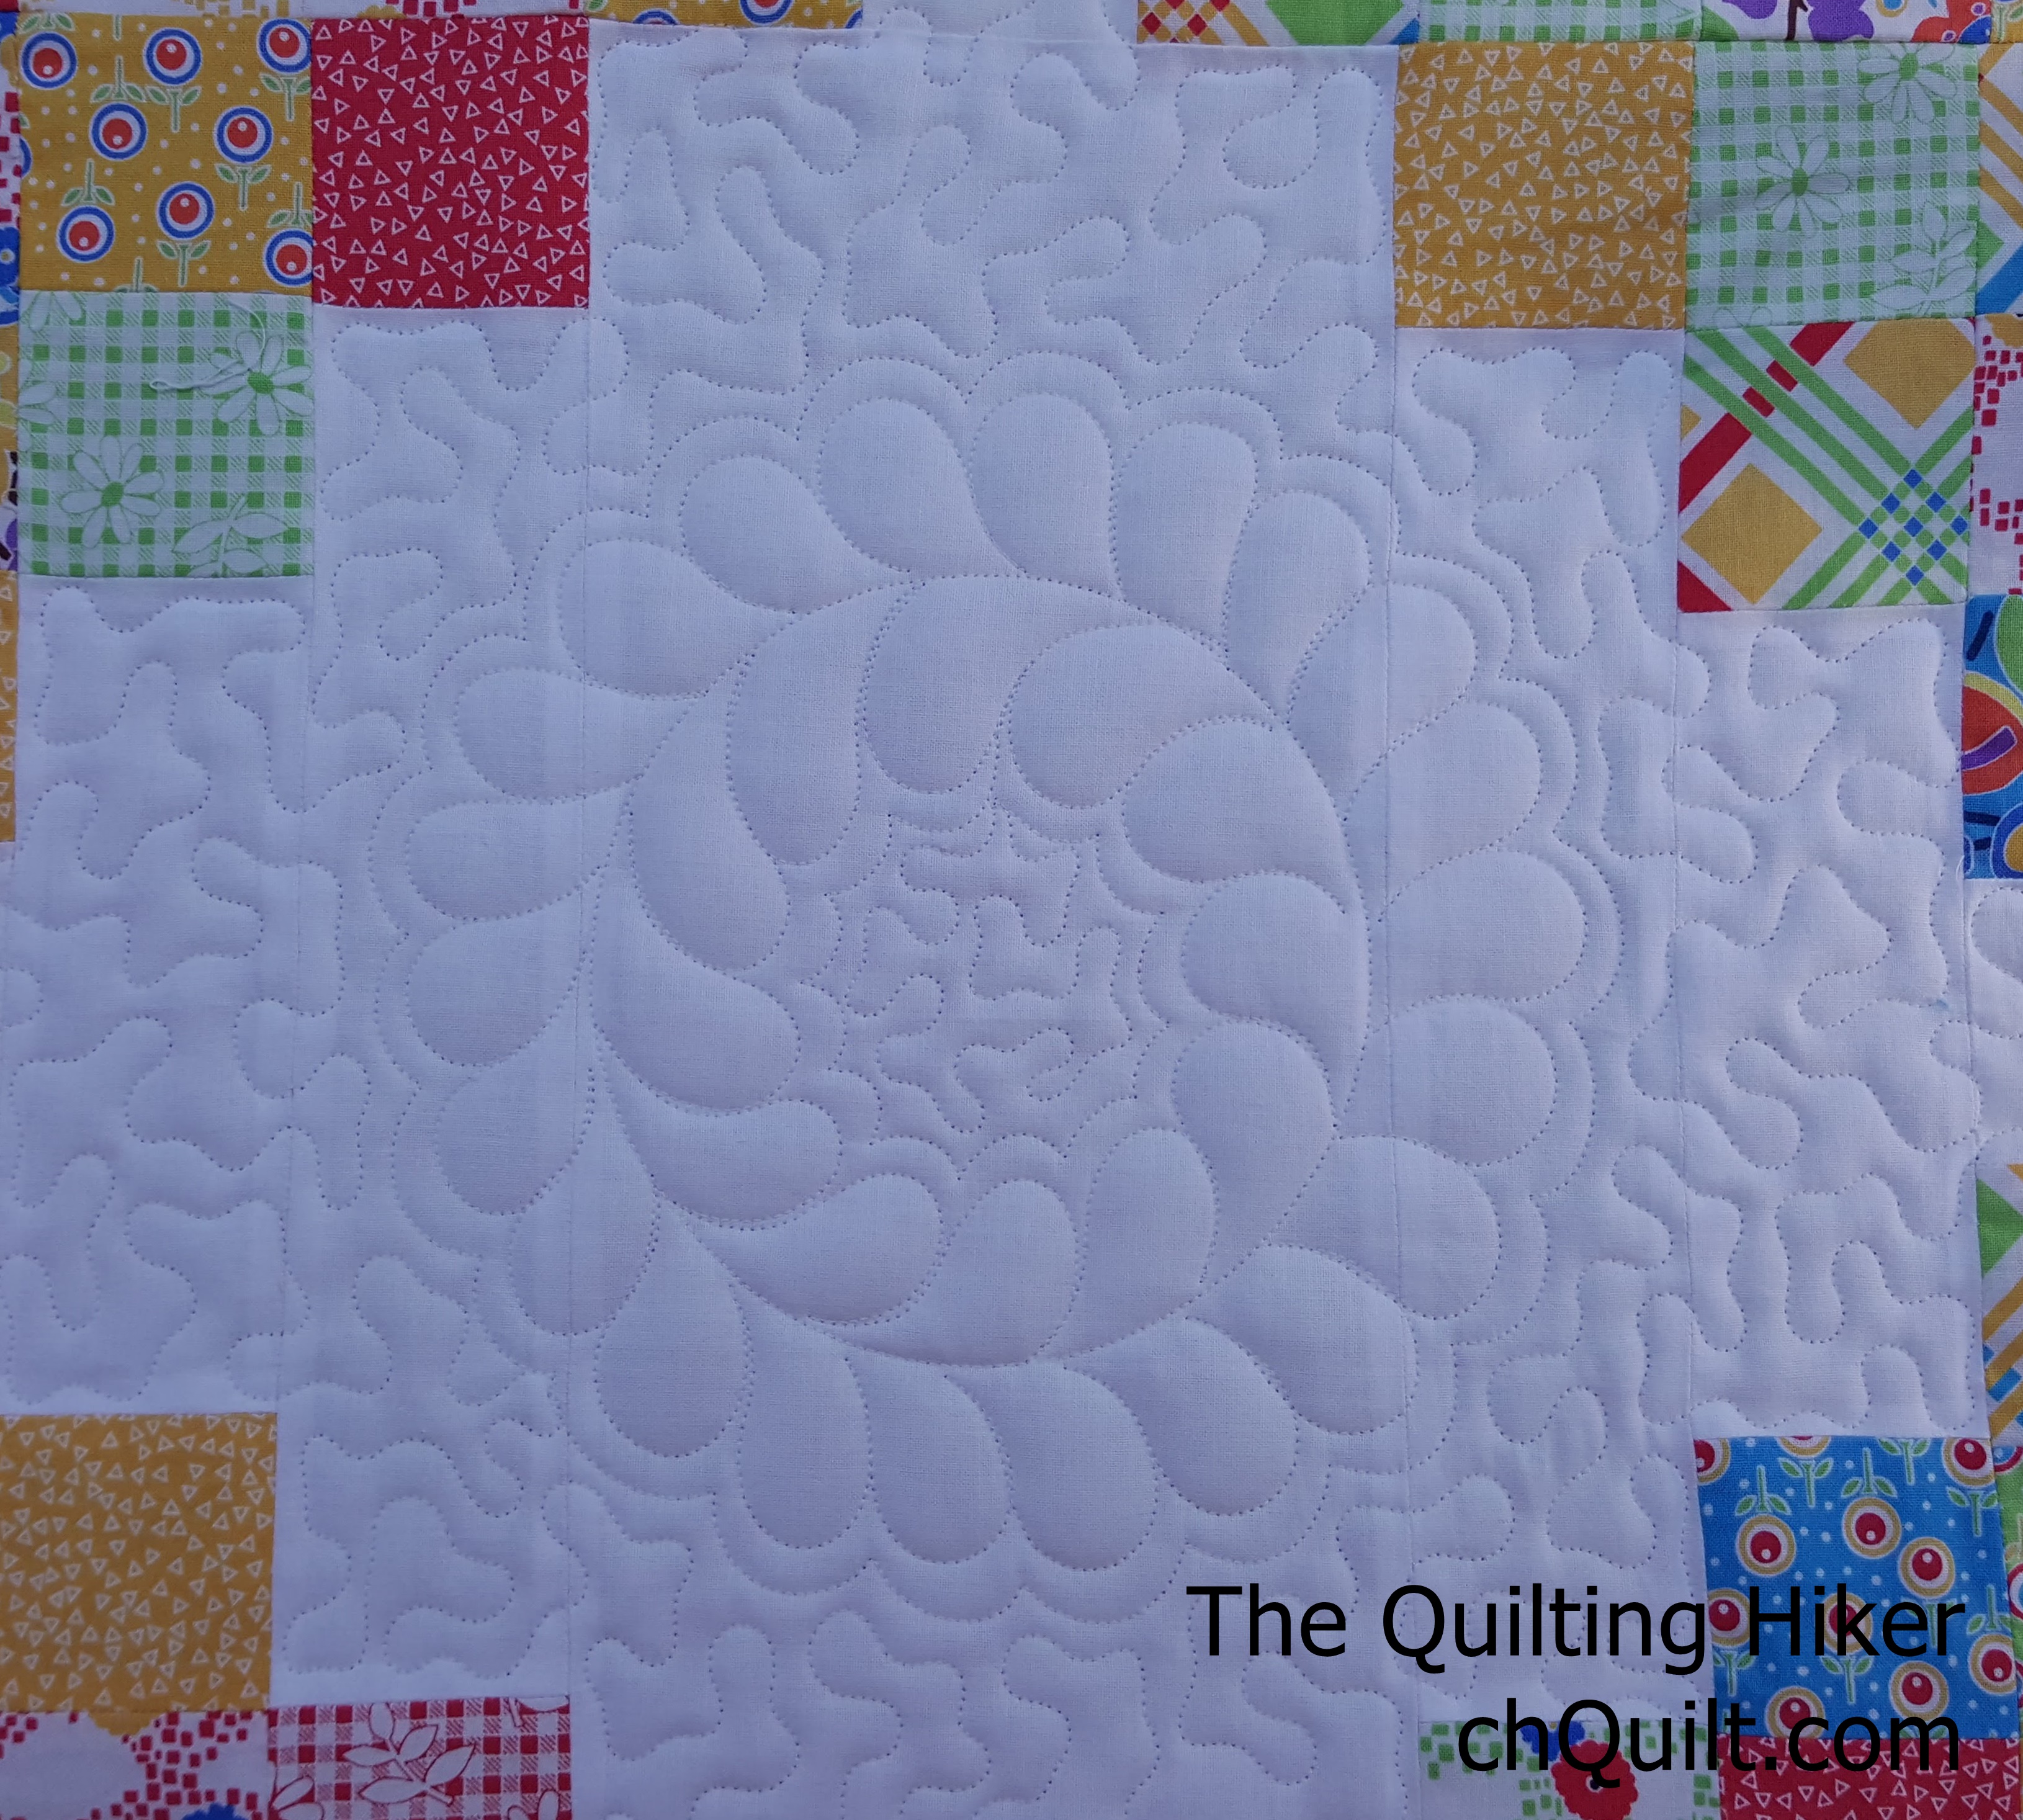
I love the way they came out. And, I can reuse the templates. The only thing I would change is making the outer circle 1/2″ larger than the finished size. I found my hopping foot would hit the template on occasion. With a larger template, I won’t have to hold the template down for the foot to go over it. I also got too close a couple of times and stitched the template down to the quilt.
It may sound like a lot of work but I believe it saved me time in not having to mark out all blocks requiring wreaths.
What do you think? Do you like the feathered wreath?
C
Very clever Cathy!
So smart! I will have to give this a try:)!
I don’t always do things the traditional way. But this was the easiest way I could think of.